Yachtmaster Offshore theory exam: what's in it and how to pass
Offshore Theory, written by a superyacht bosun with a commercial Yachtmaster Offshore · 28 October 2026
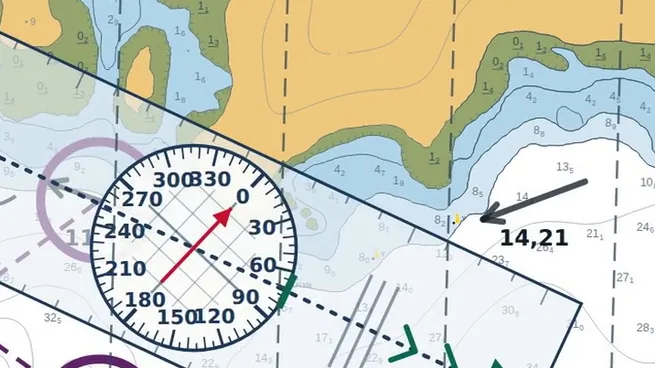
The theory behind the Yachtmaster Offshore is the chart table: fixing your position, working the tides, shaping a course and planning a passage, with the rules of the road, lights, weather and safety around it. This guide sets out what the RYA says the theory covers, and how to work through it so that it holds up in the exam and at sea.
What the theory exam is, and what it isn't
The RYA has one theory course for both Yachtmaster Coastal and Yachtmaster Offshore: the Coastal Skipper/Yachtmaster Offshore theory course. It takes your theory to the standard required for the Yachtmaster Coastal and Offshore practical exams.
The RYA gives it as 40 hours of learning, plus exam time. It is a shorebased course that can be taken in the classroom, online or by distance learning, and it expects knowledge to the level of Day Skipper Shorebased.
The Yachtmaster Offshore itself is a practical exam at sea, of at least 8 to 12 hours for one candidate and 10 to 18 hours for two. It assesses your skippering, boat handling, general seamanship, navigation, safety awareness and your knowledge of the collision regulations, meteorology and signals. Anything in the RYA Yachtmaster Scheme Syllabus and Logbook (G158) up to and including Yachtmaster Offshore can come up.
What this guide does not give you: the number of theory papers, how long each one is, or the pass mark. The RYA does not publish them on its public pages, so we do not print them here. The training centre that runs your course will tell you.
And what Offshore Theory is not: it is independent preparation for the theory, not the RYA's course. To sit the RYA theory course and its exam, you book it with a training centre through the RYA course finder.
The subjects, one by one
The RYA lists the content of the theory course as eight subjects. This is where each one is in the course.
- Position fixingModule 03: position lines, crossing bearings and the cocked hat, dead reckoning and the running fix.
- Course shaping and plottingModules 02 and 05: true, magnetic and compass, speed, distance and time, the stream and the wind, and the course to steer.
- Tidal knowledgeModule 04: tidal definitions, standard port heights, clearance under the keel and tidal streams.
- Use of almanacs and admiralty publicationsModule 06, on the real Channel: the almanac, secondary ports and the stream atlas. Module 01 covers the publications that go with the chart.
- Electronic position finding equipmentComing soon to the course.
- Taking and interpreting forecastsMeteorology: where to get a forecast and how to read it.
- Plotting weather systemsMeteorology: air masses, clouds and depressions.
- Weather predictions using a barometerMeteorology: the barometer and the go or no-go decision.
The practical exam adds the collision regulations, safety and signals. In the course those are the rules of the road, lights and shapes, buoyage, safety and radar.
Chartwork: what you must do by hand
Chartwork is done with a pencil, the dividers and a plotter, and the course has you do it that way: on screen, but by hand. Open the dividers on the latitude scale to measure distance, lay the plotter to read a bearing, and take every direction from true to magnetic to the compass and back.
Then the fix: two or three bearings crossed on the chart, the cocked hat they leave and what it tells you, and when there is nothing to take a bearing on, dead reckoning and the running fix.
Chart work: dividers, the plotter and the latitude scale →
Getting a fix: crossing bearings and the cocked hat →
Guide: course to steer and the tidal triangle →
Tides and tidal streams: the common slips
Tides are where a sum can look right and be wrong. Three things the course drills:
- Springs or neaps. Work out the day's range at the standard port, with the low water on the side of high water you need, and compare it with the standard port's mean spring and neap ranges printed with the curve. At or above springs, use the springs curve; at or below neaps, the neaps curve; in between, go the same proportion of the way from one to the other.
- The rule of twelfths. It shares out the range over six hours as 1, 2, 3, 3, 2 and 1 twelfths. It only works where the port's curve is symmetrical and the tide runs for about six hours, which is not the case at many Channel ports. For a secondary port, use the standard port's curve.
- The stream for the hour. A tidal diamond or the stream atlas gives the stream for one hour; each hour of a passage is read for its own hour.
Standard port tide tables and the tidal curve →
Free secondary port tidal height calculator →Every step of the working, the way the exam asks for it.
Secondary port tidal heights, step by step →
Springs or neaps: interpolating the tidal curve →
The rule of twelfths, and when it fails →
Passage planning
Everything above comes together in a passage plan. In the course, module 07 builds one across the Channel, from Boulogne-sur-Mer to Rye: what a passage plan is, assessing the passage, laying the route, the tide at each end, the tidal stream and the times. You do it with help at every step, then on your own, and then as an exam question.
One whole plan: Boulogne to Rye →
Guide: planning a passage, step by step →
Rules of the road, lights and buoyage
These are learnt by reading situations, not by reciting rules. Each of the nineteen steering and sailing rules has its own lesson in the course; lights and shapes go from what a vessel shows to what you can say from your own bearing; and buoyage covers which side you pass each mark, by day and by night. The three modules are free, with no account.
The nineteen COLREGs steering and sailing rules →
Guide: navigation lights and shapes, a quick reference →
Guide: IALA buoyage region A, by day and by night →
A study plan
The order matters, because chartwork builds on itself. This is the order the course follows:
- The chart, then direction, distance and time (modules 01 and 02).
- Fixing your position (module 03): everything that needs no tide.
- Tides, then the course to steer (modules 04 and 05): everything that does.
- The almanac (module 06): the move to real secondary ports and the stream atlas.
- Passage planning (module 07), where all of it is used at once.
- Alongside, at any point: the rules of the road, lights and shapes, buoyage, meteorology, safety, radar and the diesel engine.
Work each part until you can do it without the help, then go on. Each module has its reading notes to go over it again away from the chart, and the guides work the main methods through with numbers.
Sitting the practical in 2027: the requirements and a month-by-month plan →
Test yourself first
Before the exam, find out where you stand. The course ends with a mock of the theory exam: random questions from every subject of the course, then a complete passage plan, with pass or fail at the end and what to work on next. For a quick check now, the practice questions have the answer explained and a link to the lesson behind each one.
Questions
Is the theory the same for Yachtmaster Coastal and Yachtmaster Offshore?
Yes. The RYA runs one theory course for both, the Coastal Skipper/Yachtmaster Offshore theory course, which takes your theory to the standard required for the Yachtmaster Coastal and Offshore practical exams.
How long is the RYA theory course?
The RYA gives it as 40 hours of learning, plus exam time.
Can I study the theory online?
Yes. The RYA says the course can be taken in the classroom, online or by distance learning.
What do I need to know before I start?
The RYA asks for knowledge to the level of Day Skipper Shorebased.
Is Offshore Theory an RYA course?
No. Offshore Theory is independent preparation for the theory. It is not run by the RYA. To sit the RYA's own theory course and its exam, you go through a training centre listed in the RYA course finder.